How to Make DIY Abstract Canvas Art: 15 Easy Ideas to Try
A blank canvas can feel a little scary at first, but abstract painting is one of the most forgiving crafts you can try. There are no straight lines to perfect and no realistic shapes to copy, so every mark you make becomes part of the design. Making diy abstract canvas art at home also lets you match your wall colors exactly, instead of searching shops for a print that almost works.
The fifteen ideas below use simple tools you may already own, such as tape, foam, rope, a wide brush and a palette of acrylic paint. Start with the idea that looks most fun, work on a protected table, and let each layer dry before you judge it. Most of these pieces look best once they have had a day to settle.
Paint Dot Grid
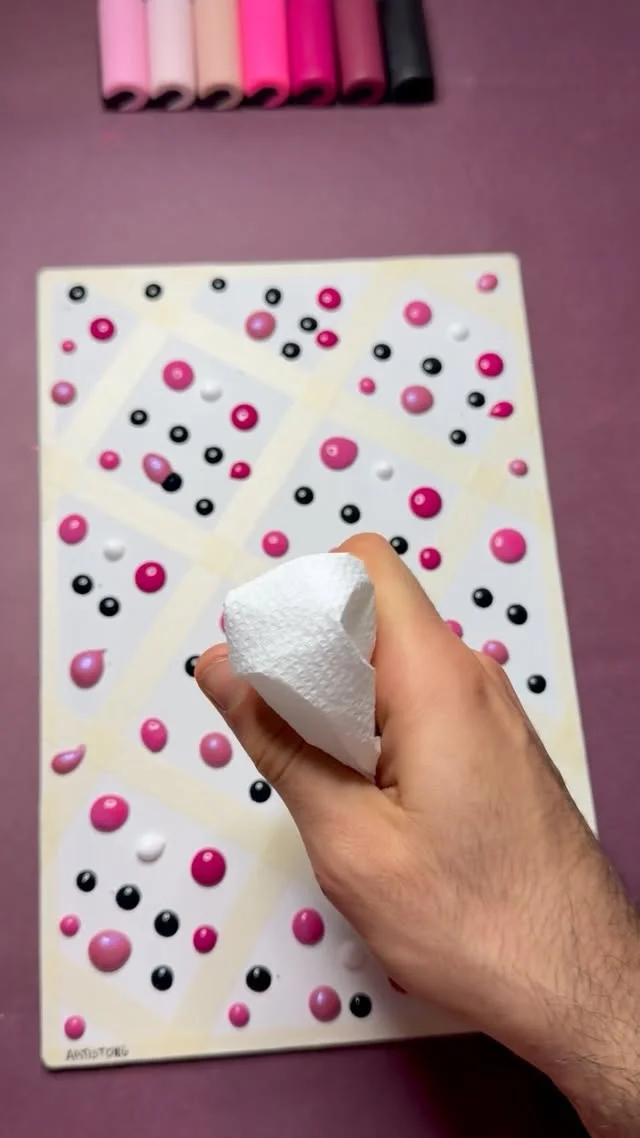
Dots are a gentle way to begin, because one dot at a time slowly builds a pattern with no pressure to fill the canvas at once. Tape lines divide the surface into neat sections, and the dots inside each section keep the whole piece looking tidy even when the colors are playful.
- Tape a simple grid across a primed canvas and press the edges down well.
- Squeeze small dots of paint into the sections using the end of a brush handle.
- Vary the dot sizes so some sections feel light and others feel full.
- Use three colors only, plus white, to keep the result calm rather than busy.
- Peel the tape away once the paint is dry to reveal clean white lines.
Step back often while you work, since a dot grid reads very differently from across the room than it does up close.
Textured Neutral Shapes
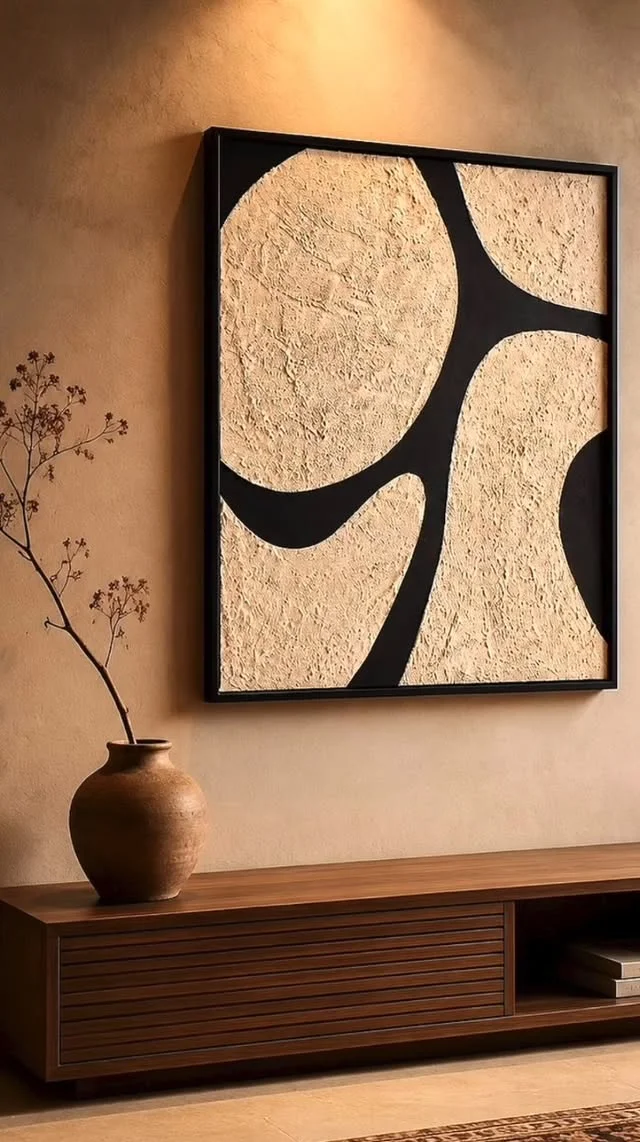
A neutral palette can still make a strong statement when the surface itself has texture. Thick paste, baking soda mixed into paint, or joint compound gives the canvas a rough, plaster like feel, and large soft shapes keep the design calm enough for a living room or bedroom wall.
- Spread a thin layer of texture paste over the canvas and let it dry fully.
- Sketch two or three large curved shapes lightly in pencil.
- Paint the shapes in warm beige and leave the gaps in soft black.
- Add a second coat only where you want extra depth.
- Frame the finished piece in a simple black frame to sharpen the edges.
This is a good choice when you want art that blends with your furniture instead of competing with it.
Gold Leaf Stripes
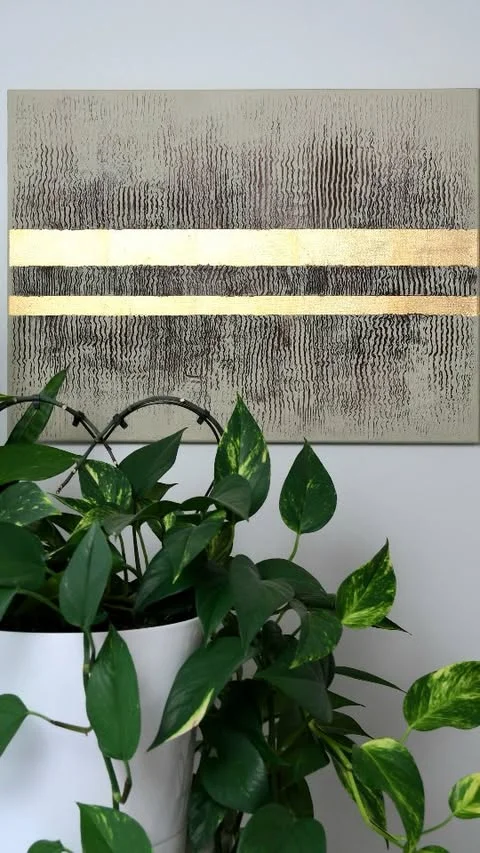
Gold leaf adds instant warmth, and a little goes a long way. Two straight stripes across a textured gray background feel modern and calm, and the metallic lines catch the light every time you walk past the piece.
Quick Tip: Apply gold leaf size, which is the special glue for leaf, in a thin even line and wait until it feels tacky, not wet, before laying the leaf down. Press it gently with a soft brush, then brush away the loose flakes. If a stripe tears, just patch that spot with a small piece of leaf and nobody will notice.
Keep the rest of the canvas quiet so the gold stays the star. One or two stripes are usually enough, and a plant nearby softens the whole display.
Color Grid Squares
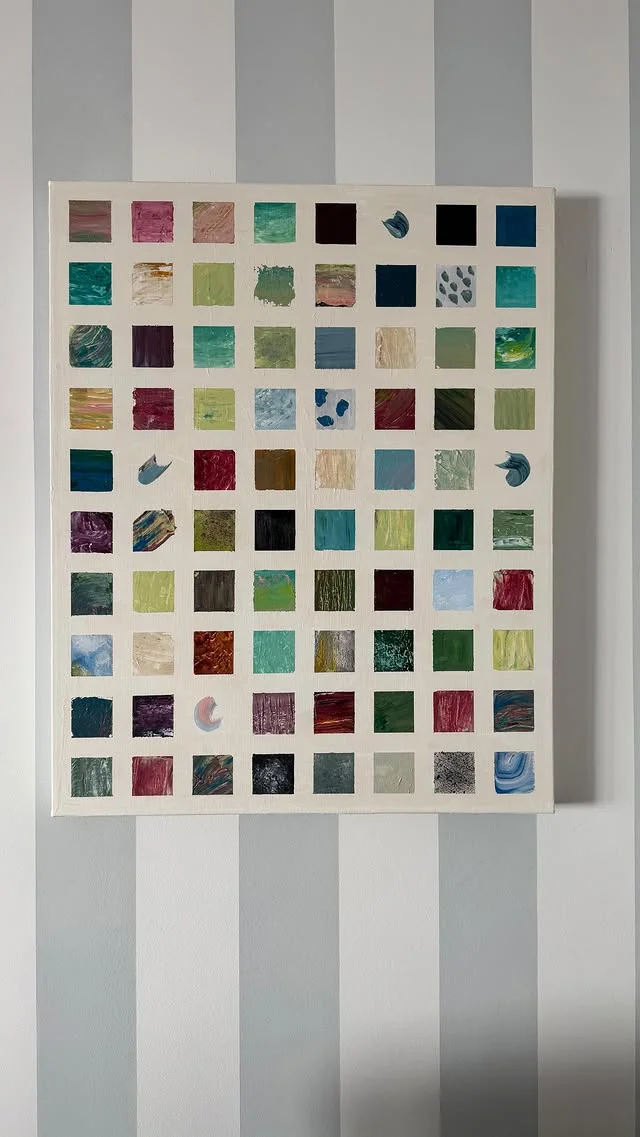
A grid of small painted squares looks impressive, yet it is really just many tiny paintings joined together. Each square can try a different color, brushstroke or texture, so the finished canvas feels rich without needing one big idea.
DO: Test your color mix on paper first, and keep a small white gap between squares so each one stays readable.
DO: Repeat a few colors across the grid so the whole piece feels connected.
DON’T: Fill every square with your brightest color, or the painting may feel loud instead of joyful.
DON’T: Rush the grid lines, because wobbly gaps are the first thing the eye notices.
This project is also a clever way to use up leftover paint from other projects, one square at a time.
Rope Texture Curves
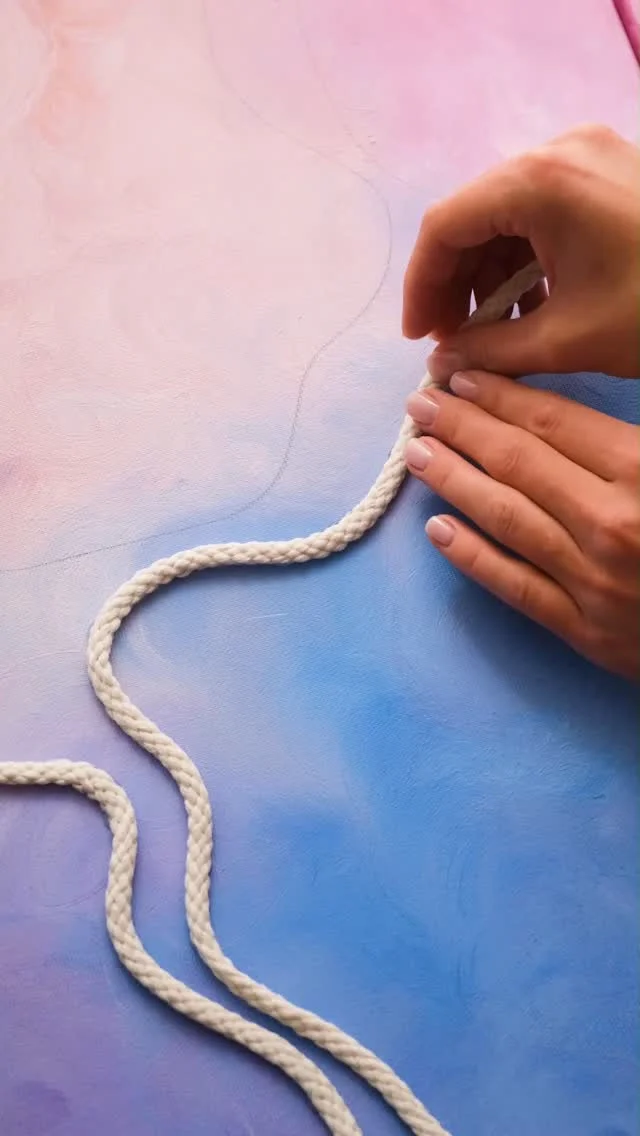
Gluing rope onto a painted canvas adds a raised line that casts a soft shadow and invites people to look closer. Curved rope lines feel relaxed and organic, a bit like a river winding across the painting, and they work beautifully over a soft pink and blue background.
Before: A flat painted background can look pretty but a little plain, especially on a large canvas where the eye has nothing to follow.
After: Once the rope curves are glued down and painted over in places, the same canvas gains movement, depth and a handmade texture that flat paint alone cannot give.
Draw your curves lightly first, then glue the rope in short sections so you can adjust the shape as you go. Trim the ends neatly and seal them with a dab of glue.
Bold Foam Swirls
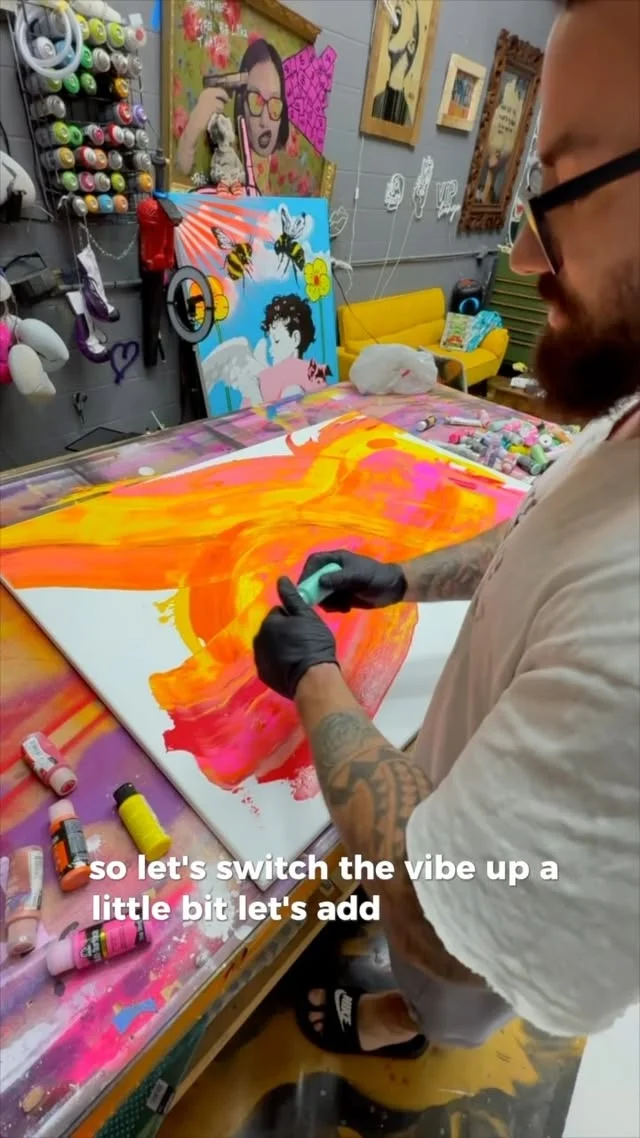
Foam tools blend paint in big soft sweeps, which makes them perfect for a bold piece that needs energy rather than detail. Orange and pink swirled together over white feel sunny and modern, and the foam keeps the edges soft so the colors melt into each other instead of fighting.
Cost: Around the price of a basic acrylic set plus a pack of foam brushes or sponges, with a large canvas as the main expense.
Time: About one hour of active painting, plus a full day of drying before hanging.
Work in large arcs from one side of the canvas to the other, and resist the urge to keep blending the same spot. Once the swirls look lively, put the foam down and let the paint dry.
Oversized Blue Mural
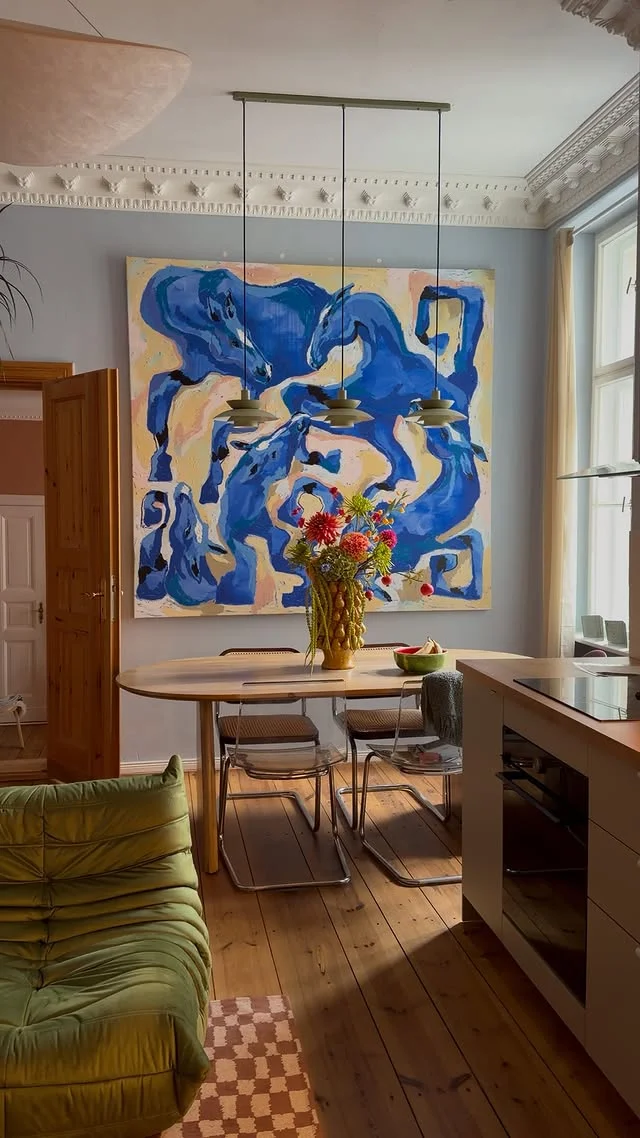
A very large canvas can change a whole room, and blue is a safe yet striking choice for a dining space. Swirling shapes in deep blue, sky blue and cream feel like water in motion, and the scale of the piece means it can hold its own above a long table.
- Choose a canvas that is at least two thirds the width of your table.
- Paint the background in a pale blue wash first.
- Add deep blue swirls with a large brush while the wash is still slightly damp.
- Leave generous areas of pale color so the painting can breathe.
- Hang it so the center sits at eye level when you are seated.
If a large canvas feels costly, try two medium canvases hung side by side for a similar effect at a lower price.
Minimal Red Circle
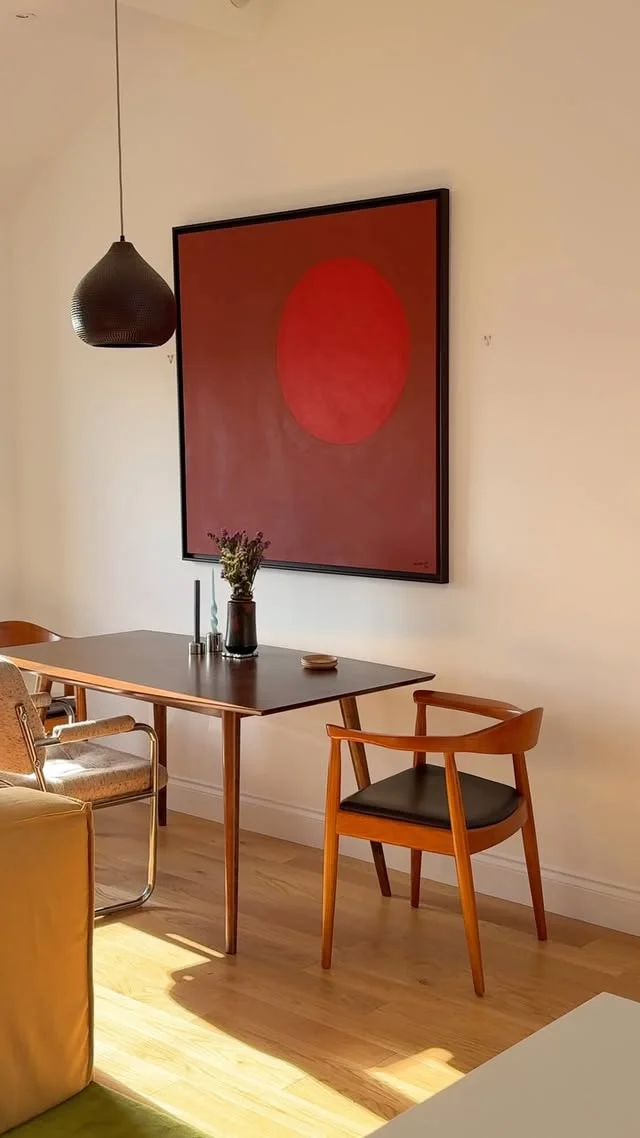
Sometimes one shape is enough. A single red circle on a warm brown background feels confident and calm, and it suits a room that already has plenty of pattern in cushions, rugs or curtains. Minimal art also forgives beginners, because there is only one shape to get right.
- Paint the whole canvas in a warm brown and let it dry completely.
- Find the center and mark it lightly with a pencil dot.
- Trace a large circle using a plate or a piece of string tied to a pencil.
- Fill the circle with two thin coats of red, letting the first coat dry first.
- Clean up the edge with a small brush and a little brown paint.
Hang this piece where it has space around it, so the single circle can breathe.
Garden Color Burst
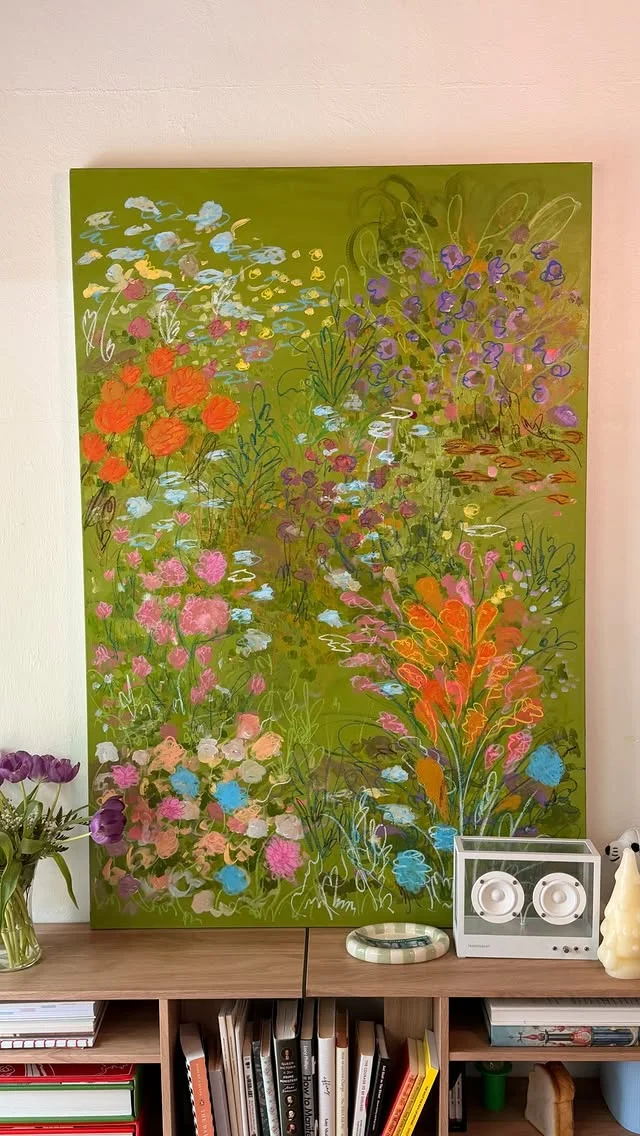
If you love color but do not want a realistic flower painting, an abstract garden burst gives you the joy of flowers without the pressure of petals and leaves. Loose dabs and flicks in green, orange and pink suggest a garden in full bloom, and the piece feels happy even on a gray day.
Quick Tip: Start with green shapes across the canvas, then add orange and pink dabs on top in clusters rather than spreading them evenly. Clusters feel like real flower beds, while even spacing can look like wallpaper. Finish with a few tiny white dots for light, and stop before the canvas gets crowded.
This style works well above a bookshelf, where its colors can pick up book spines and plants nearby.
Patchwork Texture Squares
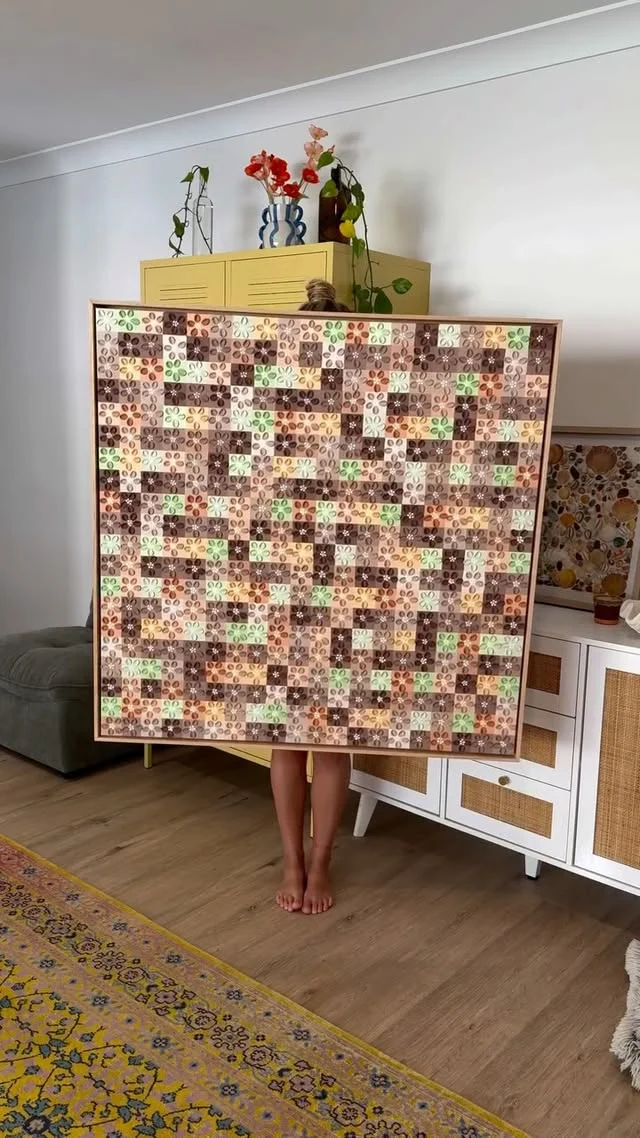
Patchwork texture feels cozy and crafted, a bit like a quilt translated into paint. Small squares of paste or thick paint, each with its own direction and depth, build a surface that looks wonderful in soft beige and brown tones and suits a calm, natural room.
DO: Vary the direction of your tool marks from square to square for a true patchwork feel.
DO: Keep your palette to two or three earthy tones so the texture, not the color, does the talking.
DON’T: Press so hard that the paste cracks as it dries, especially on a flexible canvas.
DON’T: Add a busy frame, since a plain frame lets the patchwork surface shine.
Let the piece dry flat for at least a day, because thick texture can slump if the canvas is hung too soon.
Small Canvas Trio
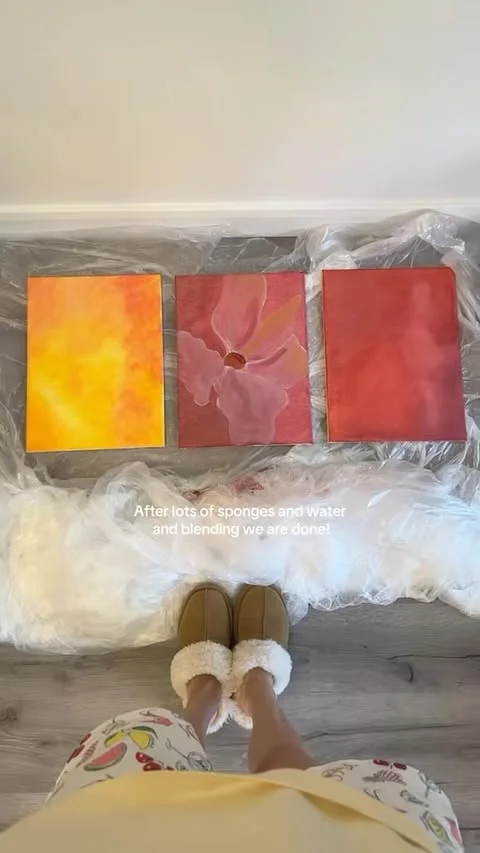
Three small canvases are less scary than one large one, and they give you a ready made set to hang in a row. Working in orange and red gradients keeps the trio united, while each small canvas can still have its own mood, from soft sunrise to deep sunset.
Before: Three separate small canvases can look random if each one uses unrelated colors and no shared idea.
After: When all three share the same orange to red range and a similar soft gradient, they read as one thoughtful set, even though each canvas was painted on its own.
Paint all three at the same time, moving your brush from one to the next, so the colors stay consistent. Hang them with equal gaps for a tidy gallery row.
Wide Brush Blocks
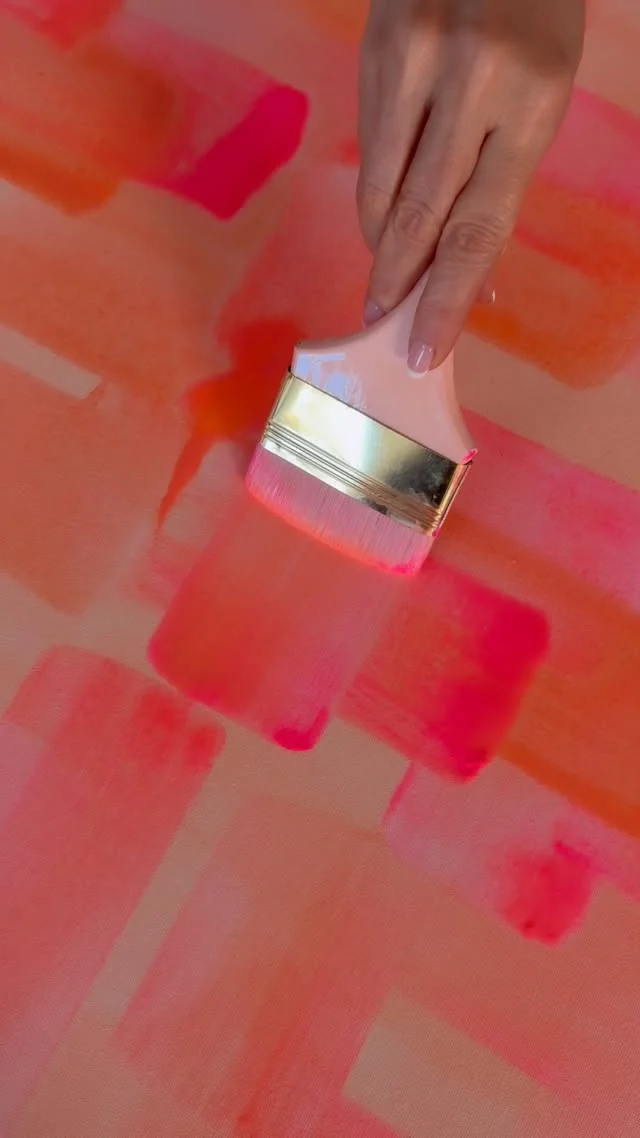
A wide flat brush makes painting feel fast and freeing, because one stroke can cover a whole section. Blocks of peach and pink, layered with slight overlaps, create a soft modern pattern that looks far more polished than the effort it takes.
Cost: A large flat brush, two or three acrylic colors, and a medium canvas are all you need to start.
Time: About 45 minutes of painting, plus drying time overnight before you hang it.
Load the brush well, press it down in one smooth motion, and lift it cleanly at the end of the block. Overlap the blocks slightly so no white gaps show, unless you want a crisp white line on purpose.
Vivid Sweep Painting
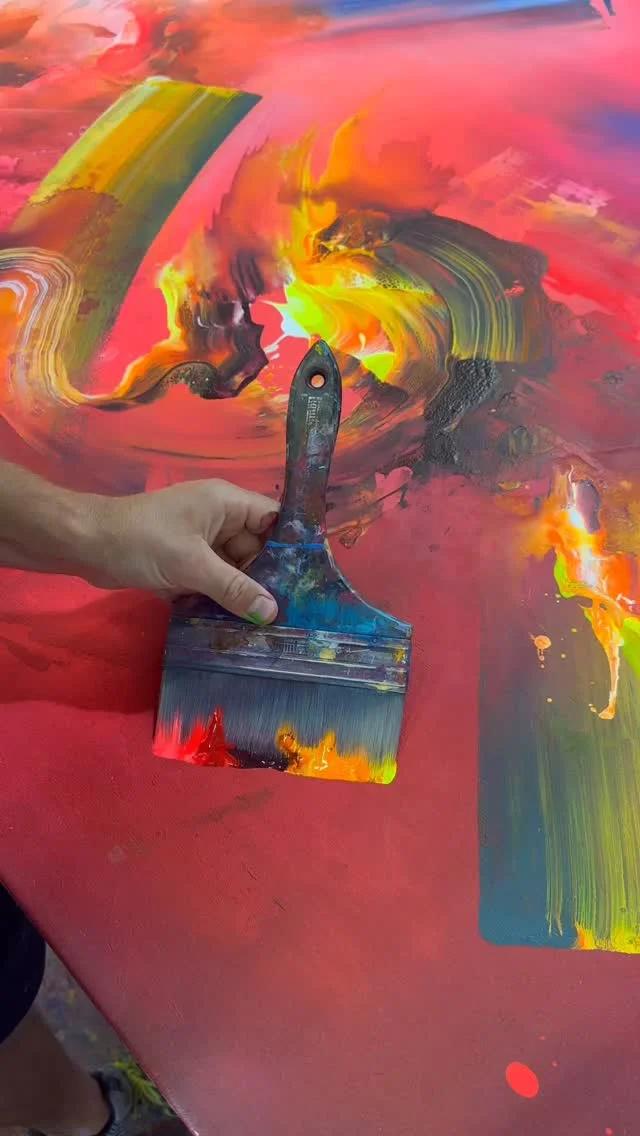
A vivid sweep painting is all about movement. Big brushstrokes in red, yellow, blue and green race across the canvas, and the energy of the strokes matters more than any single color choice. This is the idea to try when you want to paint fast and have fun.
- Pour generous amounts of paint onto a palette so you never have to stop mid stroke.
- Start with the darkest color and sweep it across in one bold arc.
- Add the next color while the first is still wet, letting the edges touch.
- Use a large brush and your whole arm, not just your wrist.
- Stop as soon as the painting feels alive, before extra strokes dull it.
Protect your floor well for this one, because vivid paint has a habit of traveling.
Swirling Color Ribbons
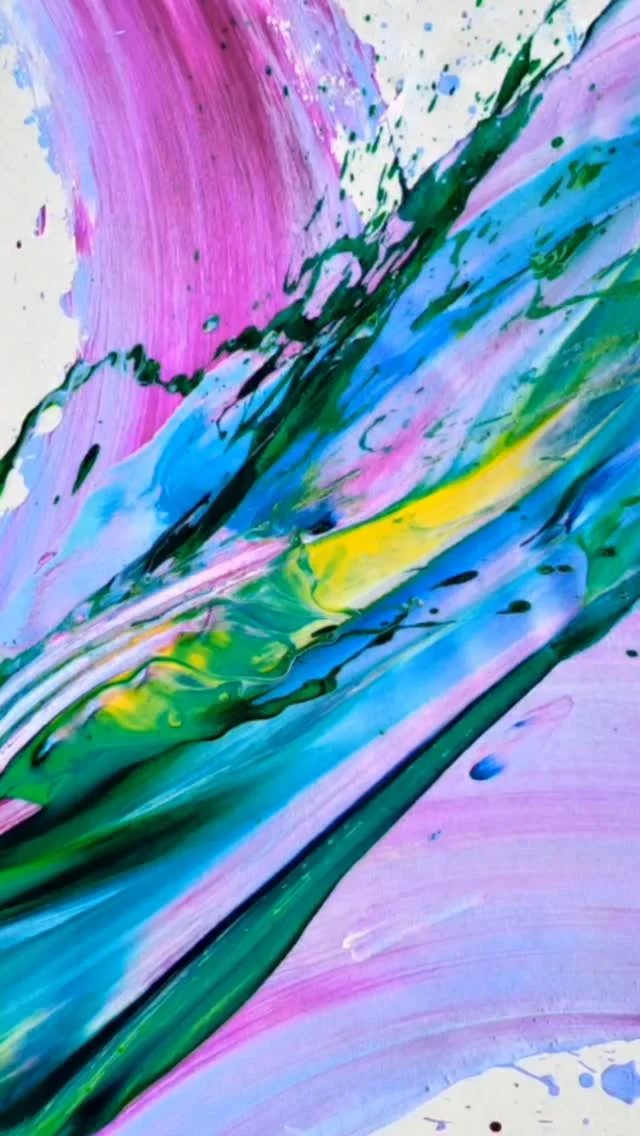
Swirling ribbons of color look like paint caught mid dance, and they are easier to make than they look. The trick is to keep the paint wet and to move your tool in long curves, letting each ribbon cross over the last one like a woven pattern.
- Thin your paints slightly so they flow smoothly without dripping.
- Lay down a pale base color and leave it wet.
- Drag a palette knife or a wide brush in long S curves across the canvas.
- Add a second color ribbon that crosses the first at a few points.
- Repeat with two more colors, then leave the painting untouched to dry.
Photograph the piece in daylight, because swirling ribbons show their depth best in natural light.
Pink Marble Canvas
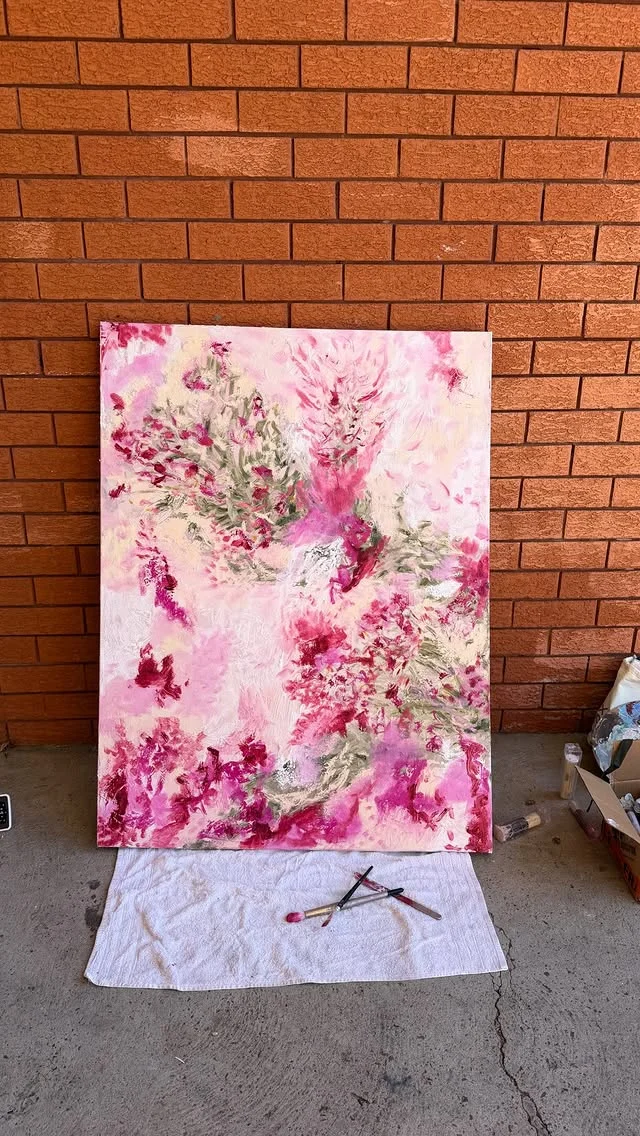
A pink marble effect feels soft and luxurious, yet it starts with a very simple trick: white paint swirled through pink while both are still wet. The result looks like stone veining, and it suits a bedroom or a calm reading corner beautifully.
Quick Tip: Work in small sections and swirl with a thin stick or the tip of a brush, using gentle wiggles rather than stirring. Stirring too much will mix the pink and white into one flat color, while light wiggles keep the veins distinct. If a section turns muddy, paint over it with fresh pink and try the wiggle again.
Lean the finished canvas against a wall first to see how it looks in your room, then hang it once you are sure of the spot.
Conclusion
You do not need training or expensive supplies to make art you are proud to hang. Pick the idea that made you smile, gather a few basic paints, and give yourself permission to make a messy first version. Most abstract pieces improve with a second look the next day, when fresh eyes can spot the one small change that finishes them.
Making diy abstract canvas art is also a lovely project to share, since friends and family can each paint a small canvas and hang them together as a set. Keep your favorite tools, note the color mixes you loved, and try the same idea at a larger size next time.
For more inspiration, explore these related guides: 18 Budget Friendly DIY Christmas Decorations You Will Love and 18 Thoughtful Homemade Christmas Gifts From the Heart.